
One great way to create a retro, grunge design for posters is to create a shape, such as a letter or number, made entirely of type. Add in some texture to the background and in just a short amount of time, you have an eye-catching design ready to send to your online printing company.
Putting a block of text into a pre-designed shape is actually quite easy when following a few simple steps. The tutorial below walks you through these necessary steps, then shows you how to create a weathered paper background, and finally reveals how to put it all together to create a retro or grunge poster. We will first start in Illustrator and then move to Photoshop for the final touches.
Resources:
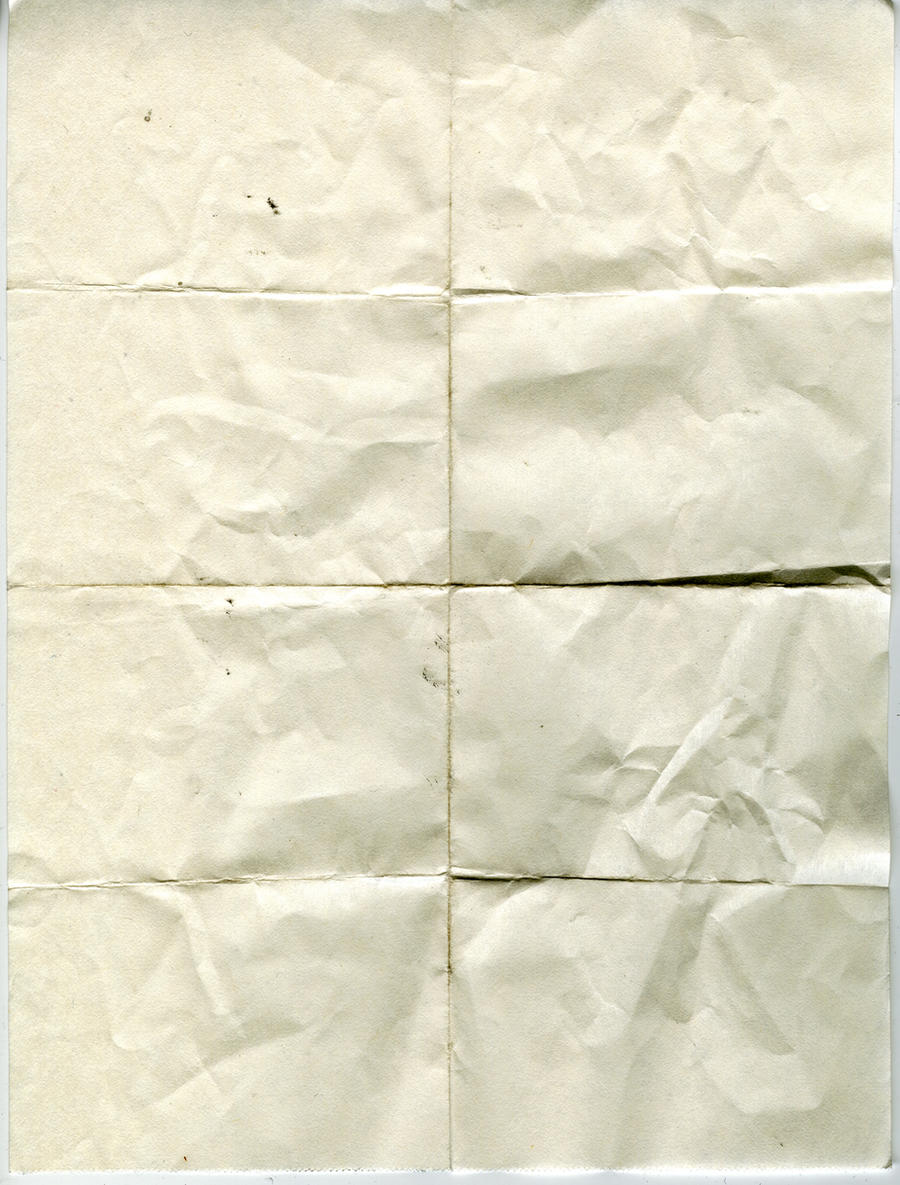
- Paper #1 – http://thedigitalyardsale.com/freebies/7-17/old_paper6.jpg
- Paper #2 – http://fc08.deviantart.net/fs71/i/2010/277/5/0/folded_paper_texture_by_spiketheswede-d303ony.jpg
- Grunge Brush – http://www.ubrushes.com/photoshop-brushes/id/138/thb-grunge-brushes-01.zip
Step 1 – Getting Started
In Illustrator, open up a new document using the Letter size default to begin.

Step 2 – Setting the Stage
You can work with whatever font family you like for this example and use any text you prefer. I’ll be using Times New Roman throughout this tutorial so that anyone can follow along. So use your Type Tool to type the letter “T” and make the text size around 750pt.

Step 3 – Create Outlines
With the giant letter selected, go to Type and select “Create Outlines” (Ctrl + Shift + O). This converts your letter into an editable object.

Step 4 – Release Compound Path
Before you can work with the text the way we want, you must release the compound paths. These are automatically generated by Illustrator. Go to Object – > Compound Path -> Release with the letter selected.

Step 5 – Fill Text
You can get some fill text from many different sources. You can use dummy text from sites like Lipsum.com or use text from your website, a classic novel, or any other source. Just be sure you have permission to use the copy if you do not own the copyright. I went to Lipsum.com and copied five paragraphs of dummy text for the next step.
Select the Area Type Tool and change your character settings to Times New Roman with a font size of 7pt. With your dummy text copied and the Area Type Tool selected, click the giant letter, and paste in your content.

Step 6 – Fill Text Cleanup
I went through and deleted out any line breaks in the copy. I also used the Window -> Type -> Character palette to center justify the text.

Step 7 – Different Letter Sizes
We could stop there, but I want to take this over the top to demonstate the power of this technique. With your Type Tool, type the letter “G” somewhere on your Artboard, so long as it’s not on our letter. Change the font size to 21pt. I rotated the letter “G” a few degrees and dragged into the middle of my shape.

Go to Object -> Text Wrap -> Make, so that the text will wrap around our letter “G”.

Now, go to Object -> Text Wrap -> Text Wrap Options:

I used a setting of -4pt on the Offset and moved the letter around to get it to look like I wanted it to look.

Repeat this process for lots of letters to taste. Round letters work better, so stick with letters like G, O, R, S, Q, etc. And change up the text sizes as well.

Step 8 – Fill in the Blanks
You can further tweak the design by filling in the blank areas around the larger letters. Just use your Type Tool with a font size of 7pt. Type outside the shape area and move the new text where you need it.

Step 9 – Shift to Photoshop
Once you have your letters the way you like them, select all (Ctrl+A) and open Photoshop. Make the canvas size the same for the Illustrator document of Letter or 8.5×11 inches at 300 pixels/inch.

Now paste (Ctrl+V) the information from Illustrator into your Photoshop document. When prompted, select Paste As “Smart Object“. Position the letter where you’d like it and press “Enter” to confirm the placement.

Step 10 – Background
From the resources above, download Paper #1 and paste it into a new layer below your vector image and above the background.

Create a new layer above the old paper layer and grab your Rectangle Marquee Tool. Select an area that doesn’t quite go to the edges of your paper and fill with your color of choice. I used #13bfb9.

Step 11 – Layer Mask Setup
With the Rectangle Tool, draw a shape all the way over the giant letter. I chose the color #e7190e.

Hide the square you just made for a moment. Ctrl+Click on the Vector Smart Object layer or right-click on the layer and choose “Select Pixels“.

Unhide the square layer and click the “Add Vector Mask” button. The beauty of this arrangement is that you can quickly change the color of the font, apply a gradient, or whatever else you’d like at a later point.

Step 12 – More Typography
Now that we don’t need the extra tools that Illustrator offers for type, we can use the built in features of Photoshop to continue to work on our design. With the Type Tool, I put “Times New Roman” at the bottom in our red color. The font size is 72pt and Times New Roman.

Step 13 – Destruction
Download the grunge brush and load it into Photoshop. In the teal square layer, click “add vector mask“. Change the foreground color to black, and begin using the various brushes at different sizes to add texture to the background. If you ever add too much grunge to the background, just select the foreground color as white to clean it up a bit.

Repeat this process for the “Times New Roman” layer.

Of course, you can now add some texture to our giant letter “T” as well. Make sure the Vector Smart Object layer has been hidden.

Step 14 – Texture
To give the piece a cohesive texture, download the above Paper #2 and paste on top of the image. You will have to resize it to get it to fit across the image properly. Set the blending mode to Soft Light with a 50% opacity.

Step 15 – Tweaks
I’m not happy with how well my big letter “T” is showing up, but we have lots of options for making it easier to see. We can change the color, fade the background, or reach for the Blending Options. Right-click on the “T” layer and select Blending Options. I added a stroke with the following settings:

I also want to take better advantage of the teal layer. Set the blending mode to Color Burn to make the textures underneath it really pop out.

All of your colors are very easy to change because we used layer masks to make our texture changes. So if you need to tweak any of the colors, you can.
To tone down the lightened effect of the texture we added, add an Adjustment Layer at the bottom of the Layer palette. I used the Photo Filter with a blue lens at 20% to cool off the graphic. And that’s it!

When all is said and done, we have a very tweakable poster ready for print. Keep in mind that you can complete all of these steps with a completely original design. Use a different shape, a different font, a different layout, colors, or background and you have your own interesting typography poster!


The final output is amazing and easy to follow
helping tutorials and creative design.
Wow this is really very cool and creative tutorial
cool, thanks man
[…] How to Create a Typographical Shape for Posters […]