
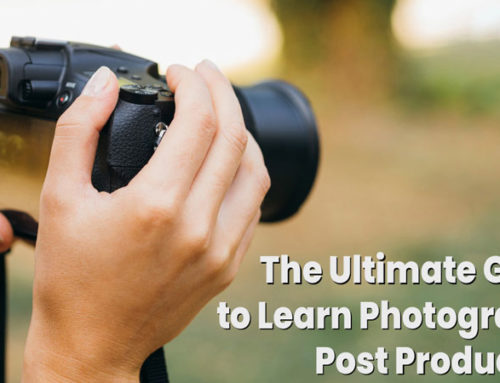
Night photography allows you to capture breathtaking nighttime landscapes with city lights and starry skies. It’s also an excellent opportunity to try out different camera settings and gear. Taking images at night, on the other hand, might be difficult for beginners. It necessitates adjusting ISO, aperture, and shutter speed, along with other things.
There are a few handy tips and approaches for shooting in the dark discussed in this article. Once you’ve mastered the fundamentals, you’ll find that night photography is a lot of fun. Don’t be scared to try new things; you’ll end up with amazing photos you’ll be pleased with.
It all comes down to being prepared and exploring your camera’s various settings when shooting at night. Here are some things to think about if you want to get the most out of your nighttime photos:
Location scouting and planning
Because you’ll be working in the dark, scout your site and plan your shots ahead of time. Make a list of any potential hurdles or roadblocks. Is there any artificial lighting on the premises? Does the hue of the lights change? Which angle appears to be the most appealing? What are the greatest ways to make the most of the light you have?
In night photography, knowing where you’re going and what you want to achieve is crucial. You’ll also need an attractive foreground subject for a good night shot.
Also, prepare to be outside for long amounts of time if you’re filming at night. From setting up the tripod and camera to tweaking the camera settings for proper exposure time, getting outstanding night photography images takes time and work.
It’s also crucial to plan your night photography expeditions from a safety standpoint. If getting to the place necessitates some hiking, you must be extremely cautious. Keep your phone, GPS, headlight, bright flashlight, warm clothes, snacks, and water with you at all times. When visibility is only a few meters ahead at night, it’s easy to become disoriented, not to mention if you’re stuck in a fog or snowstorm.
A sturdy tripod
You’ll need a sturdy tripod before diving into night photography. Long exposures are required for photographing in low light, which means your camera must remain steady at all times.
To check if your tripod is straight, use the bubble spirit level that came with it. You can also use your camera’s virtual horizon (usually available in the camera menu) to ensure that your gear is balanced.
Also, consider purchasing a tiny tripod for difficult angles.

Shoot RAW
JPEG is a great file format for most casual photographers, but it greatly compresses your image files, which might be an issue when capturing subjects with a lot of dynamic range. Switch your image files to RAW in your camera’s settings when shooting at night.
The first “rule” of night photography setup is to shoot RAW. RAW photos have a lot more detail than jpeg ones. When it comes to photo editing, it’s also a superior format. When editing night photographs, the dynamic range is wider, and the flexibility to adjust the white balance is crucial.
Shoot in manual mode
Although autofocus on modern cameras is quite reliable, it is not without flaws. Its flaws are most obvious while taking images at night when your camera struggles to adjust due to the darkness. When you use manual focus, your camera won’t focus on any region of the scene you’re capturing at random.
When you shoot in manual mode, you have complete control over your camera’s settings. Take your time to get your settings right since nighttime photography necessitates working slowly and deliberately.
Exposure time
The so-called “500 rule” is an excellent place to start when calculating exposure time. That is, you divide 500 by the focal length of the lens you’re using to get the exposure time in seconds.
The “500 rule” is intended to avoid excessively long exposure durations that would result in visible star trails in the photograph. Larger exposure durations are possible with wide-angle lenses than with longer focal length lenses.

Do bracket exposures
When capturing images at night, nailing the proper exposure can be difficult. By bracketing your images, you may avoid guessing your settings. This method entails capturing a series of photos at various exposure settings. Each photograph you take gradually becomes brighter or darker. Ideally, one of those photos will provide you with the desired exposure.
Your exposure can be bracketed manually or automatically. Set your camera to Aperture Priority or Speed Priority for manual bracketing. Take one regular photo, then adjust the exposure in subsequent images using the Exposure Compensation button (the +/- symbol). Automatic Bracketing can be found in the Shooting Menu of your camera.
You can use the bracketed photographs to create High Dynamic Range (HDR) images in addition to offering you a variety of exposures in-camera. This technique recreates the exposure range and features that a standard camera is unable to capture by combining numerous photographs in an editing tool.

Shoot at a low ISO
When photographing at night, using a high ISO may seem like a good idea, but it also increases the amount of noise in your photographs. The latest high-end cameras are so advanced that they can snap photos with no noise at extremely high ISO levels (up to ISO 3200 or more). Sticking to a lower ISO is the most feasible approach for most consumer cameras with a limited light sensitivity range.
Learn how to use your camera’s ISO levels to their full potential. Take several low-light test photographs with various ISO levels to accomplish this. Examine the images to see at what ISO level they become too noisy. If ISO 1600 appears to be useless, choose a level lower than that.
It doesn’t imply you should use ISO 25,000 just because your camera can. It’s safe to keep your ISO low because you’re using a tripod. Instead of increasing the ISO, try using slower shutter speeds and larger apertures.

Use Aperture Priority Mode
If you don’t understand how Manual Mode works, you can utilize Aperture Priority instead for static subjects. When you shoot in this mode, you can set the aperture you wish and the shutter speed is automatically selected.
The quickest approach to capture images at night is to use Aperture Priority. You’re ready to shoot once you’ve set your camera to this mode and selected a wide aperture. This setting is the safest technique to take nighttime shots as long as there are no moving subjects.
It’s also ideal for photographing static objects such as buildings and landscapes. However, because you can’t modify the shutter speed manually, it’s difficult to predict whether moving subjects (like people or cars) will be fuzzy or clear in your photo. Switch to Manual Mode or Speed Priority Mode if you want more control when photographing moving objects.
Composition
Darkness is difficult to work with in terms of composition since you can’t see what’s around you. As a result, it’s critical to shoot as many images as possible from various perspectives. Only when the photographs have been imported into editing software can the final effects be seen.
The most critical single aspect you should get perfect on location is finding a good composition. This isn’t something that can be fixed in post-production any longer. So take your time and locate that perfect melody. It can be difficult at times, and you may not be able to locate it, but don’t give up. That is something that everyone is dealing with. That’s what night photography is all about: a challenge!
Editing
These days, editing night photography, or any photography, is just as crucial as shooting on site. Especially when shooting RAW, as unprocessed RAW photographs tend to be flat and dull. It’s your responsibility to bring the vision to life. The RAW image contains a lot of info and detail that you can’t see right away.
Basic Adjustments:
You can begin by making a few basic modifications to your RAW image. This includes adjusting exposure, white balance, shadows, and contrast, among other things.
HSL and Split Toning:
The HSL panel allows you to do so much more than just increase or decrease vibrance/saturation. When you only adjust the vibrance and saturation of a hue, it’s common for it to become overly intense.
Each of the eight primary colors can be controlled separately using the HSL panel. Each of them has its Hue, Saturation, and Luminance controls (HSL).
Split toning lets you control the hue of the highlights and shadows independently. It’s a powerful color-control tool that’s often ignored. It allows you to give your image a really clean and beautiful color theme.
Add a Radial Filter:
To edit the region surrounding the selected or focus subject, use the radial filter tool. It’s directly above the basic adjustment panel in the tools strip. The radial filter modifications are only applied to the selected area and not to the rest of the screen.
Add a Background Glow:
The following step is a clever trick. You can apply a glow effect behind the subject, just as there is a light source behind the horizon.
The new range masking tool, which is part of the local adjustment tools, can be used to accomplish this. It refines the selection made with local adjustment tools that are based on color or brightness.
Getting the Foreground and Sky Just Right:
The final steps are to fine-tune the sky and add more detail to the foreground.


Leave a Reply